
Video Ads & Improved Local Voice Functionality
MomentFeed has been hard at work with some updates that will continue to change the way our clients do localized marketing. This latest release includes:
- Ad Performance Map
- Facebook Video Ads
- Tracking & Conversion Pixels
- Day and Time Cycling on Campaigns
- Post Editing in LocalVoice
- And much more!
Below is a detailed breakdown of these new features. As always please reach out to your Client Success Manager with any questions you may have.
Campaigns
Ad Performance Map
While MomentFeed makes it easy to view both aggregate campaign and individual location data from the Campaigns Insights Dashboard, it can still be a challenge to identify regional trends that might help optimize future campaign performance. MomentFeed's new Ad Performance Map allows advertisers to view heat maps displaying ad performance at the location level as well as the targeted radius around each location (for Local Proximity targeting). Not only does this allow for easy, at-a-glance campaign analysis, it also makes a great visual for external presentations of campaign reach and impact.
The Performance Map is accessed through the Campaigns Dashboard by clicking the Campaign name and selecting the Show Map button on the location-level breakdown.
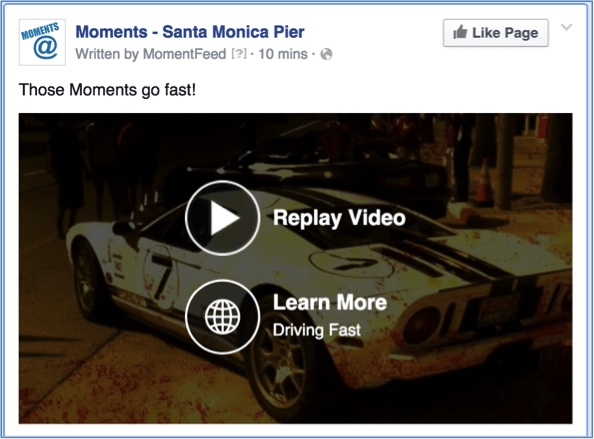
Video Ads
In 2014, 3.6x more video content was viewed on Facebook than in 2013. There were over 491 million video views on Facebook last September alone (and that's just for desktop). Needless to say, video marketing presents a tremendous opportunity for brands to reach consumers with relevant content on Facebook. With this release, those brands can now use MomentFeed to launch and manage those Facebook video campaigns, but at a hyper-local level.
Creating a New Video Campaign in MomentFeed
Create a New Campaign and fill out the "Type" information. On the "Creative" tab, upload the video file as well as a photo, which will serve as the "Cover Image" for your video (what Facebook users will see before the video plays).
Note the following file requirements when creating video ads on Facebook:
- Recommended cover image size: Your cover image will show on your ad when the video is not playing. It should be at least 1,200 x 675 pixels
- Video: 1,080 pixels
- Ratio: 16:9 ratio
- File size: 1GB maximum
- Text: 90 characters
If one of the goals of your video campaign is to drive users to a website, you can include a URL link as well as a call to action button to the ad. These will be displayed to viewers at the end of the video.
Notes:
- Local Proximity Targeting is currently not available for video ads. This is a Facebook limitation that we're working to have lifted.
- The custom MomentFeed objectives click-to-call, click for directions and click to order cannot be combined with video creative.
Tracking & Conversion Pixels
MomentFeed's localized Facebook campaigns are ideal for driving offline conversion. Tests have also proven that localized targeting and messaging are highly effective in driving online conversion as well. To better track these conversions, Campaigns now supports Facebook tracking and conversion pixels. When placed on your website, these pixels track the actions taken by Facebook users on web link ads, allowing for a more true measure of results & ROI.
With MomentFeed, you can either create new Facebook pixels or import existing pixels directly into Campaigns.
Importing Existing Facebook Pixels
If you already have Facebook pixels set up on your web pages, importing them into Campaigns is easy. From the dashboard, select the "Tracking Pixels" option.
Next, select the "Pull FB Pixels" button. This will initiate the sync process with Facebook, importing all existing pixels for the connected Ad Account. All verified pixels can be used immediately in new MomentFeed Campaigns.
To create a new pixel, navigate to the Tracking Pixels dashboard and select the "New Pixel" button.
Give your pixel a unique name and then assign an appropriate tag for the tracked action. For example, if the goal is to drive online orders from a local restaurant, Checkout would be the appropriate tag.
After the pixel has been created, you will need to copy the pixel code by selecting the red "View Pixel Code" button. This line of code will then need to be inserted into the HTML of your tracked webpage.
Note that you do not need to create a different tracking pixel for each local instance of a Page (i.e. every local landing page on your website). So long as the measured action is the same, the same pixel can be used across all local Pages. That same pixel does however still need to be placed correctly for each page you would like to track.
Once the pixel has been placed on your web page(s), the pixel will need to be verified. To verify a pixel, simply visit one of the web pages where the pixel has been placed. Refresh the pixel status in MomentFeed. The status should change from Unverified to Verified.
Adding Pixels to a Campaign
Once a pixel has been verified, it can be added to a campaign. There are two types of pixels that can be attached to a campaign: Conversion and Tracking.
A conversion pixel will optimize bidding to drive a specific conversion (e.g. checkouts or mailing list registrations). These will become the primary "Actions" that the campaign is optimized to drive.
A tracking pixel on the other hand will not impact the bidding for the campaign but will, instead, allow basic tracking of web page actions (e.g. key page visits/views).
Note that both tracking and conversion pixels can be used in tandem to track the customer journey through the funnel. For example, a tracking pixel could be placed on the Order Page while a conversion pixel can be placed on the Checkout Page. This is a great solution for brands that drive online orders for offline transactions, like food delivery or pickups at specific locations.
Day & Time Cycling
When marketing to consumers around individual locations, it's critical that the message be delivered at not only the right place, but also at the right time. After all, asking customers to "click for directions" to your nearby business doesn't make much sense if that location isn't open. Day & Time Cycling in MomentFeed Campaigns eliminates this problem by allowing brands to run their ads only at specific times on specific days of the week. It's an ideal solution for time-sensitive messaging like lunch specials, recurring day-specific promotions, etc. and minimizes the ad waste generated by off-hours impressions.
To add Day & Time Cycling to your campaign, select the "Active Period" options on the "Type" tab in the Campaign Creation Wizard.
Note that multiple time ranges can be specified for the selected "Active" days. So, for example, an ad could be scheduled to run only before lunch and dinner hours at your restaurant, maximizing relevant reach among customers that are most likely to be interested in the message.
Detailed Campaign Actions Breakdown
One of the challenges of measuring user actions on Facebook campaigns is that Facebook does not roll up ad-level actions into campaign-level totals. The more ads a brand runs in a campaign, the more difficult it is to pull these user action data together at the campaign level. To better understand the types of engagements your campaign is generating, visit the Campaigns Dashboard and click the number in the "Actions" column. This will open the Campaign Actions breakdown.
There are two tabs in the Campaign Actions breakdown. The first tab shows a count of the total objective-oriented actions. For example, if the objective is Website Clicks, the Actions tab would display the total Link Clicks. The second tab, Inline Actions, shows the aggregated breakdown of all other engagement activity on the campaign.
Faster Audience Estimations
When a Facebook campaign originates from a single brand page, estimating the potential audience size is fairly straightforward. Targeting options are sent to Facebook and the potential audience size, as well as estimates on CPM, CPC, etc., are returned. Running these estimations simultaneously across hundreds or thousands of Location Pages, as is done in MomentFeed, is a far more complex operation that pushes the limits of Facebook's API. As a result, we've seen some slowness in audience estimation for larger campaigns. In this release we've made some big improvements to the way our estimations are run, dramatically increasing the estimation speed on large national campaigns.
Automatic Retry of Failed Ads
When a campaign launches across a thousand locations at once, it's not uncommon for Facebook to return an error on a handful of locations. In the vast majority of cases these are general Facebook errors that have nothing to do with the actual ad that was submitted. Rather than allow the ad for that location to fail outright, MomentFeed Campaigns will now retry any failed ad automatically up to 4 times until successful. These retries reduce unnecessary time spent troubleshooting when Facebook throws unnecessary and random errors on a handful of ads in a campaign.
Local Voice
Editing Pending Posts
Sometimes the creative on a pending post needs to be changed before it goes live. Perhaps there's been a last-minute change to the creative or there was a typo in the original post. Previously in MomentFeed, users wishing to make a change would need to delete the post then start over from scratch. In this release, LocalVoice users will be able to edit the text and image elements of a pending post before they go live.
To Edit a Pending Post
- Go to the Published tab and check the box for a single piece of pending content (indicated by a yellow status bubble).
- Click the edit button. This will launch the publishing wizard.
- Edit the content as you like.
- Preview and save the post. The new version of the creative will be posted on the originally scheduled date and time.
Notes:
- Edit capability only applies to pending content. Content cannot be edited after it has been published.
- Currently, only content text and images can be edited prior to publishing.
Re-Tweet Capability
In the latest of a series of enhancements to MomentFeed's Twitter capabilities, this release brings the re-tweet to LocalVoice.
To Re-Tweet a Piece of Content
- Click the re-tweet icon.
- Edit the post (optional) and click Publish.
- A record of your re-tweeted content will be kept on the Published view in LocalVoice.